A quick tour of Burroughs MCP using retro-b5500
The first Burroughs B5500 emulator we will look at is retro-b5500 by Nigel Williams and Paul Kimpel. We'll get the the system set up, install the operating system, enable time-sharing and enter a simple BASIC program interactively.
Using retro-b5500
As mentioned in the introduction, retro-b5500 runs in any modern desktop web browser. It aims to emulate each component of the system with a graphical user interface so you get a taste of what it would be like to operate the machine.
The project includes some great information on its wiki, starting here, describing how the system works and what you need to do step by step. Rather than repeat this here, I will give a summary of the steps involved along with some screenshots. For a first install I recommend you use the server code hosted on the web and the default configuration.
Getting the Burroughs software
You will need a copy of the virtual install tapes for MCP. Unisys, the current owners of the OS, have provided a license to use these non-commercially. Go to Burroughs B5500 Mark XIII System Software, read and accept the license, download the files, unzip and store them somewhere.
You will also need to download the cold start card image.
Power on and set up media
Go to the main page and click Start & Power On. Accept the default configuration and the emulator front panel will pop up along with windows for each peripheral. Note that you should keep the main page visible at all times otherwise the browser may think it's inactive and starve resources from the emulator. I have found it OK to arrange windows I don't use often, such as the card punch, into tabs instead of windows.
Find the tape drive window and load the uncompressed system tape you downloaded earlier, then click the REMOTE button.
Find the card reader and load the cold start card you downloaded earlier. Click the START button.
On the operator console, click CARD LOAD SELECT.
On the SPO (operator console), ensure REMOTE is selected.
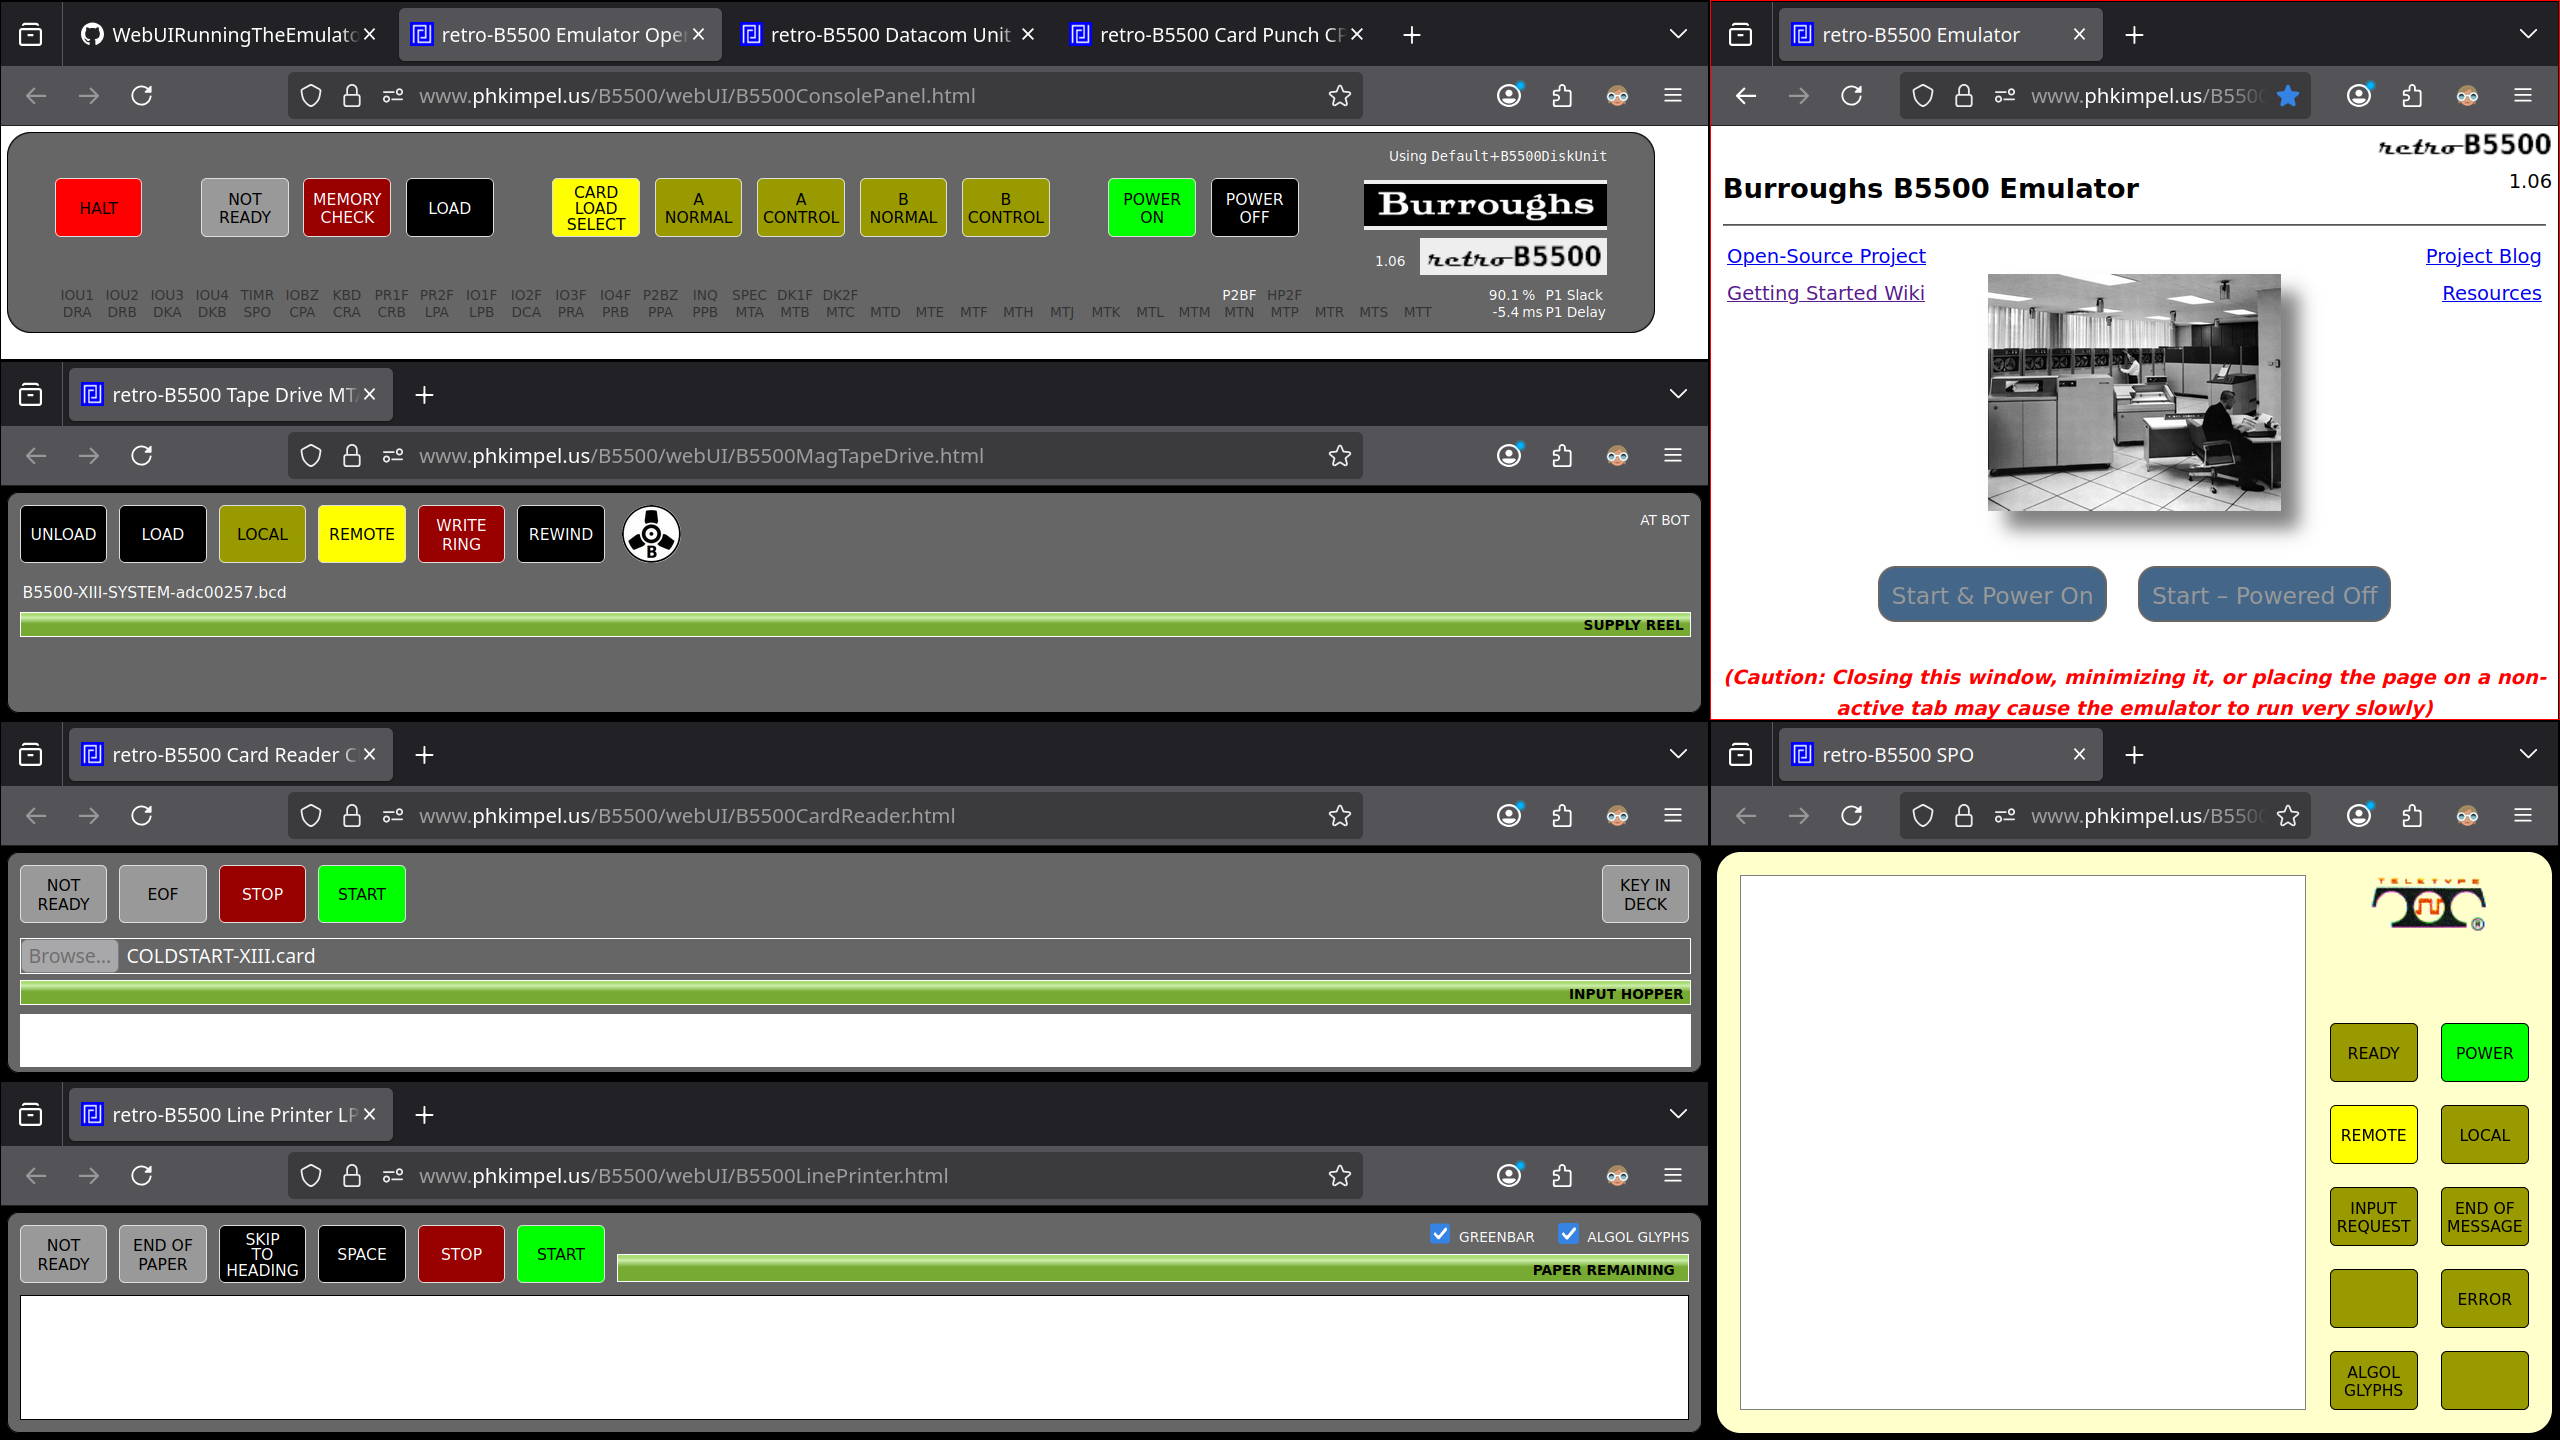
Arrange the windows so you can see all the above. Your screen should now look something like this:
 retro-b5500 just before starting the install. Source: Rupert Lane. License: CC0.
Install the operating system
Follow the wiki instructions on cold starting the system. This will involve:
- Booting the system from the card deck.
- The system will start and read from the tape drive, and then initialise the disk. This is all automatic and you should see console messages, ending with MCP FILE LOADED.
- It will then reboot and load from disk from the first time.
- You will be prompted to enter the date and time on the SPO.
- More software will be automatically installed to the disk.
- You will then set the intrinsics (system library).
This should all take less than ten minutes. After this is done, you can shut the system down by pressing the HALT button - there's no special shutdown procedure.
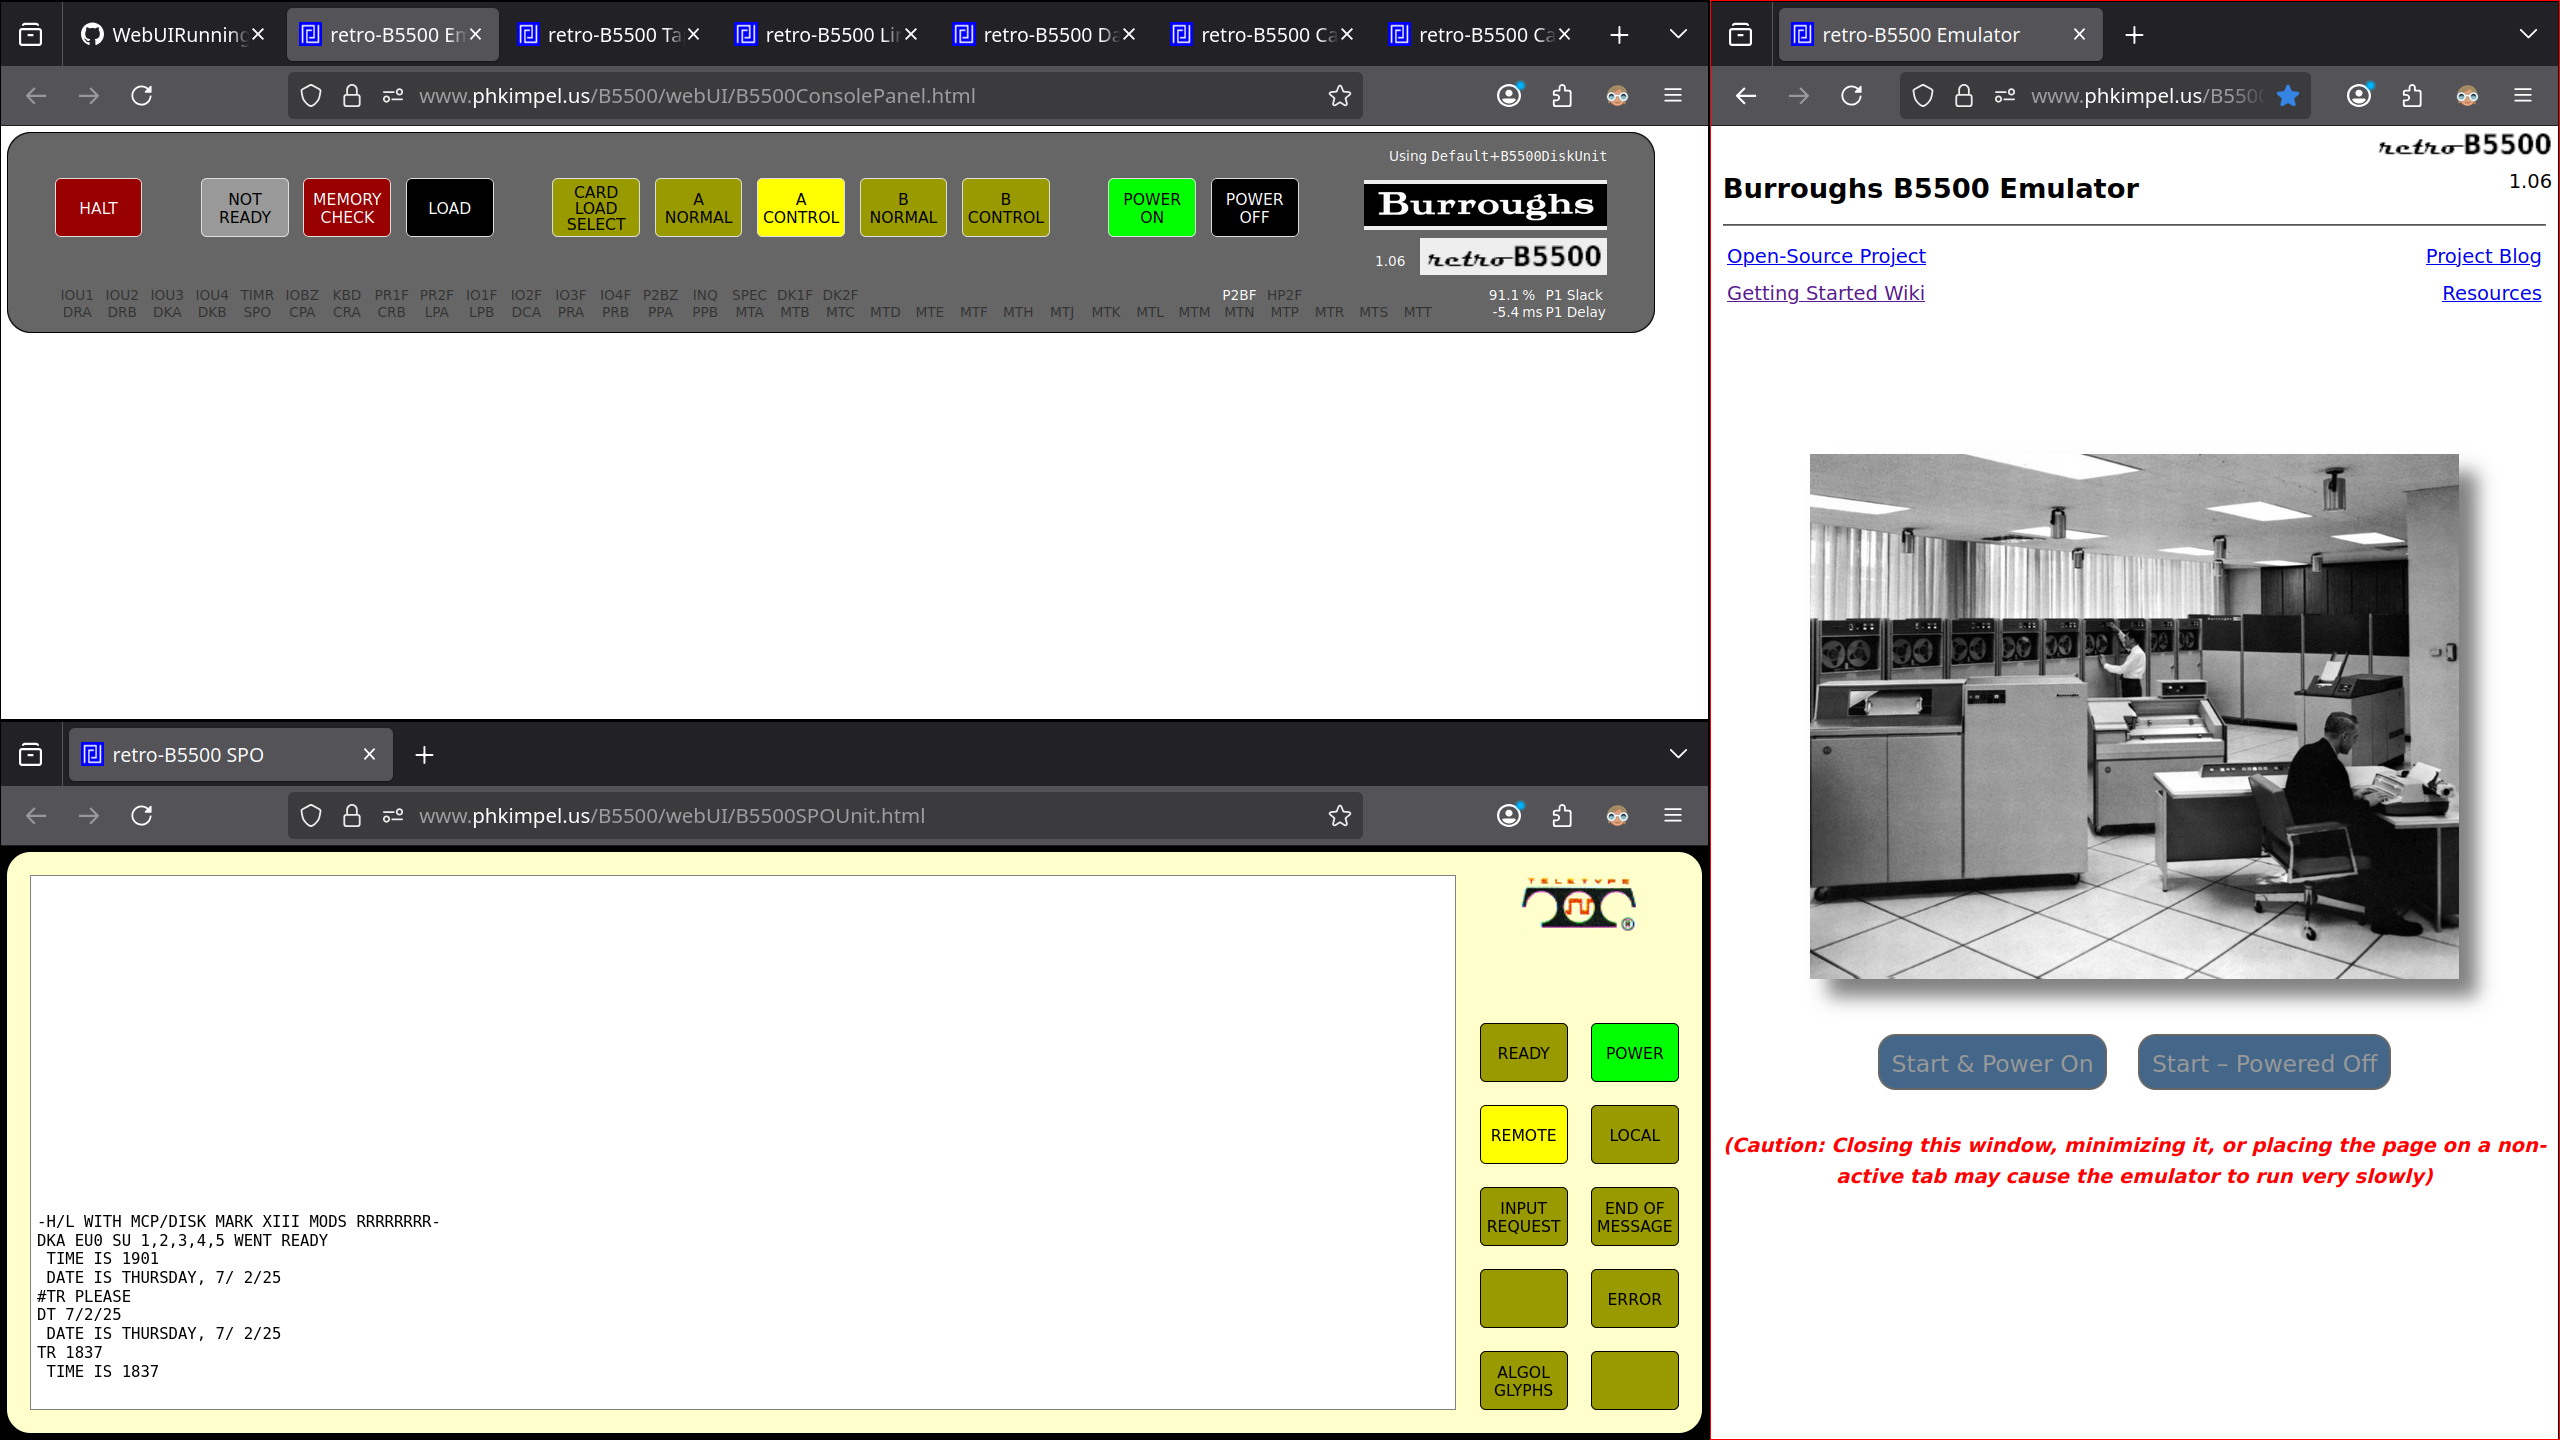
You can restart by pressing LOAD. The system will ask for the date and time again and look something like this:
 retro-b5500 on first boot. Source: Rupert Lane. License: CC0.
The guide has one more section on Loading Additional System Files which you can follow if you want, but we will basically load the entire tape as part of the next section so this is not necessary.
Install time-sharing
At this point the system can accept and run batch jobs. To add time-sharing (CANDE) we need to install more components. Switch over to WebUI Setting Up TSMCP and CANDE for this.
You will need to create two new card files to control terminal line set up and specify user accounts as part of this. Load each of these into the card reader and press START, and the system will read and create these files on disk.
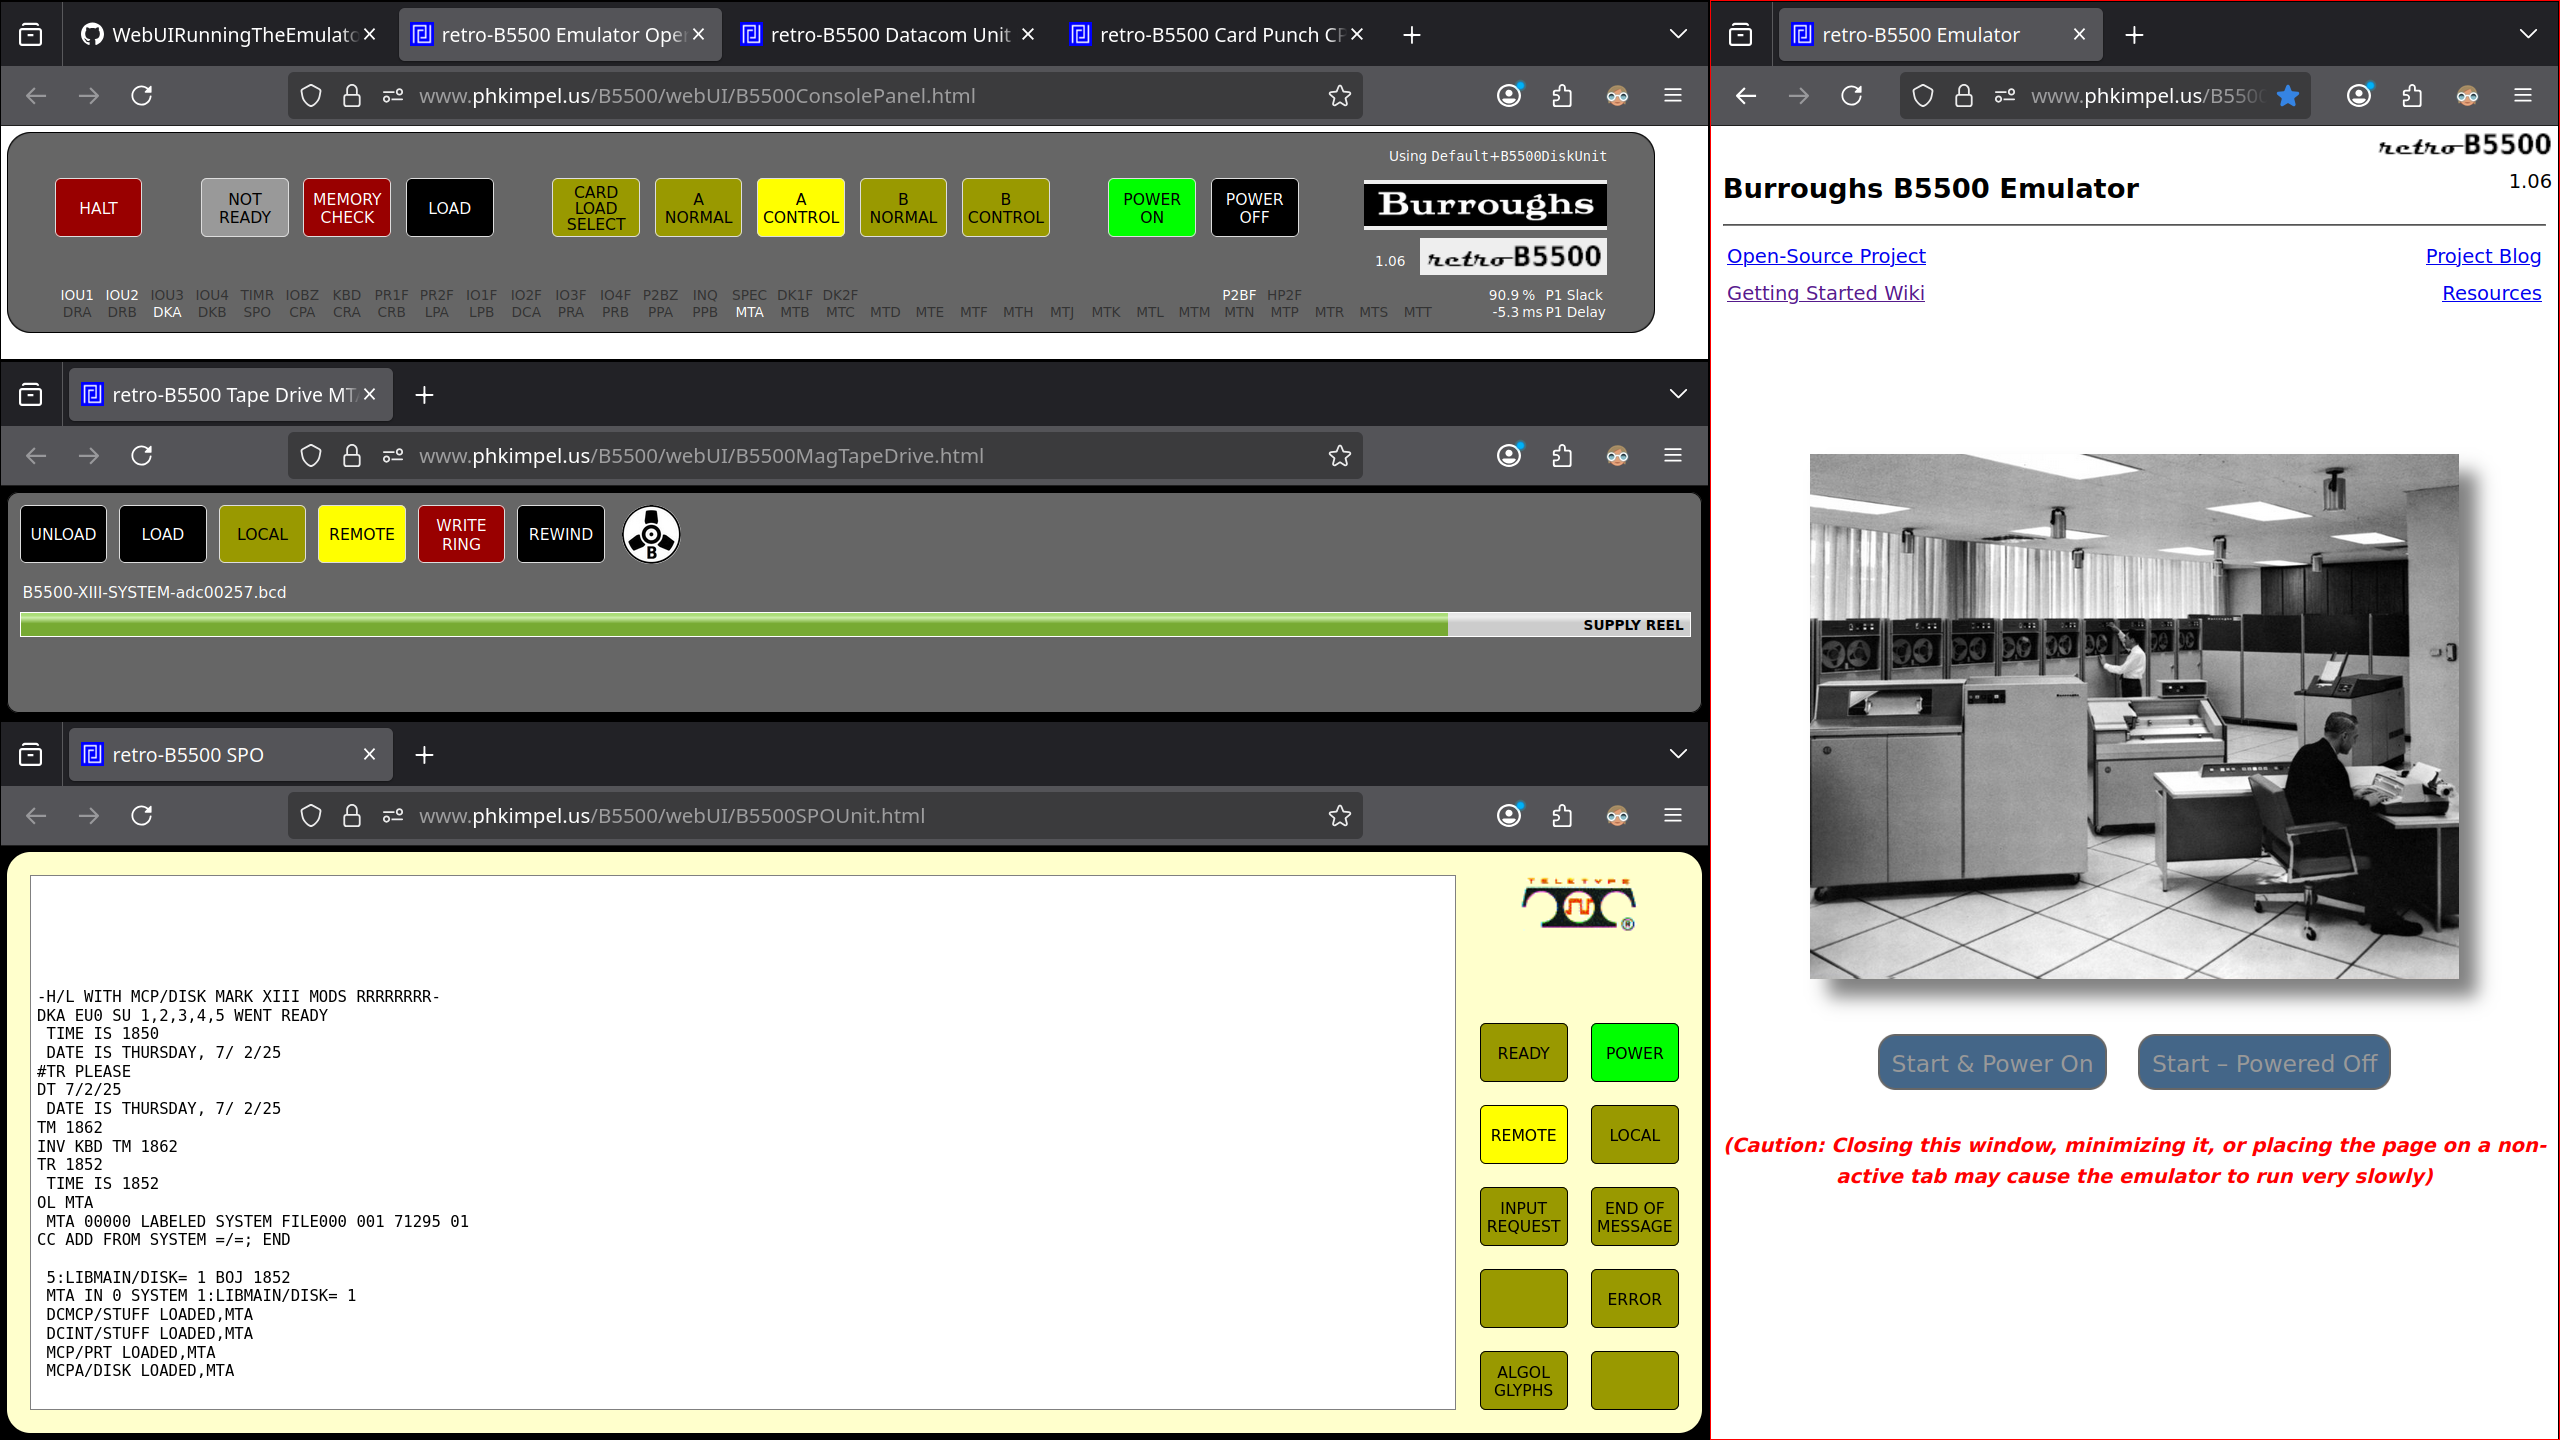
You then tell the system to load all files from tape with the CC
command specified in the above wiki. While this is happening, the
screen will look like this:
 Installing CANDE on retro-b5500. Source: Rupert Lane. License: CC0.
Finally, tell the system about the new install with the CM and CI
commands, and halt-load.
Using time-sharing
When you next start up, enter date and time as before, and enter one
more operator command CE to begin time-sharing. (This will need to
be done each time you start the system.)
Now find the Datacom window and press CONNECT. You may need to hit enter to get a login prompt. Type the user name and password you specified earlier - when the screen prompts for the password it will type some characters that on a real typewriter would overwrite the password, but on a screen this will not, and you do need to wait for the overprint to stop before entering the password.
Once you are logged in, try creating a simple program and running it:
CREATE HELLO BASIC
10 FOR I = 1 TO 5
20 PRINT "HELLO, WORLD"
30 NEXT I
40 END
RUN
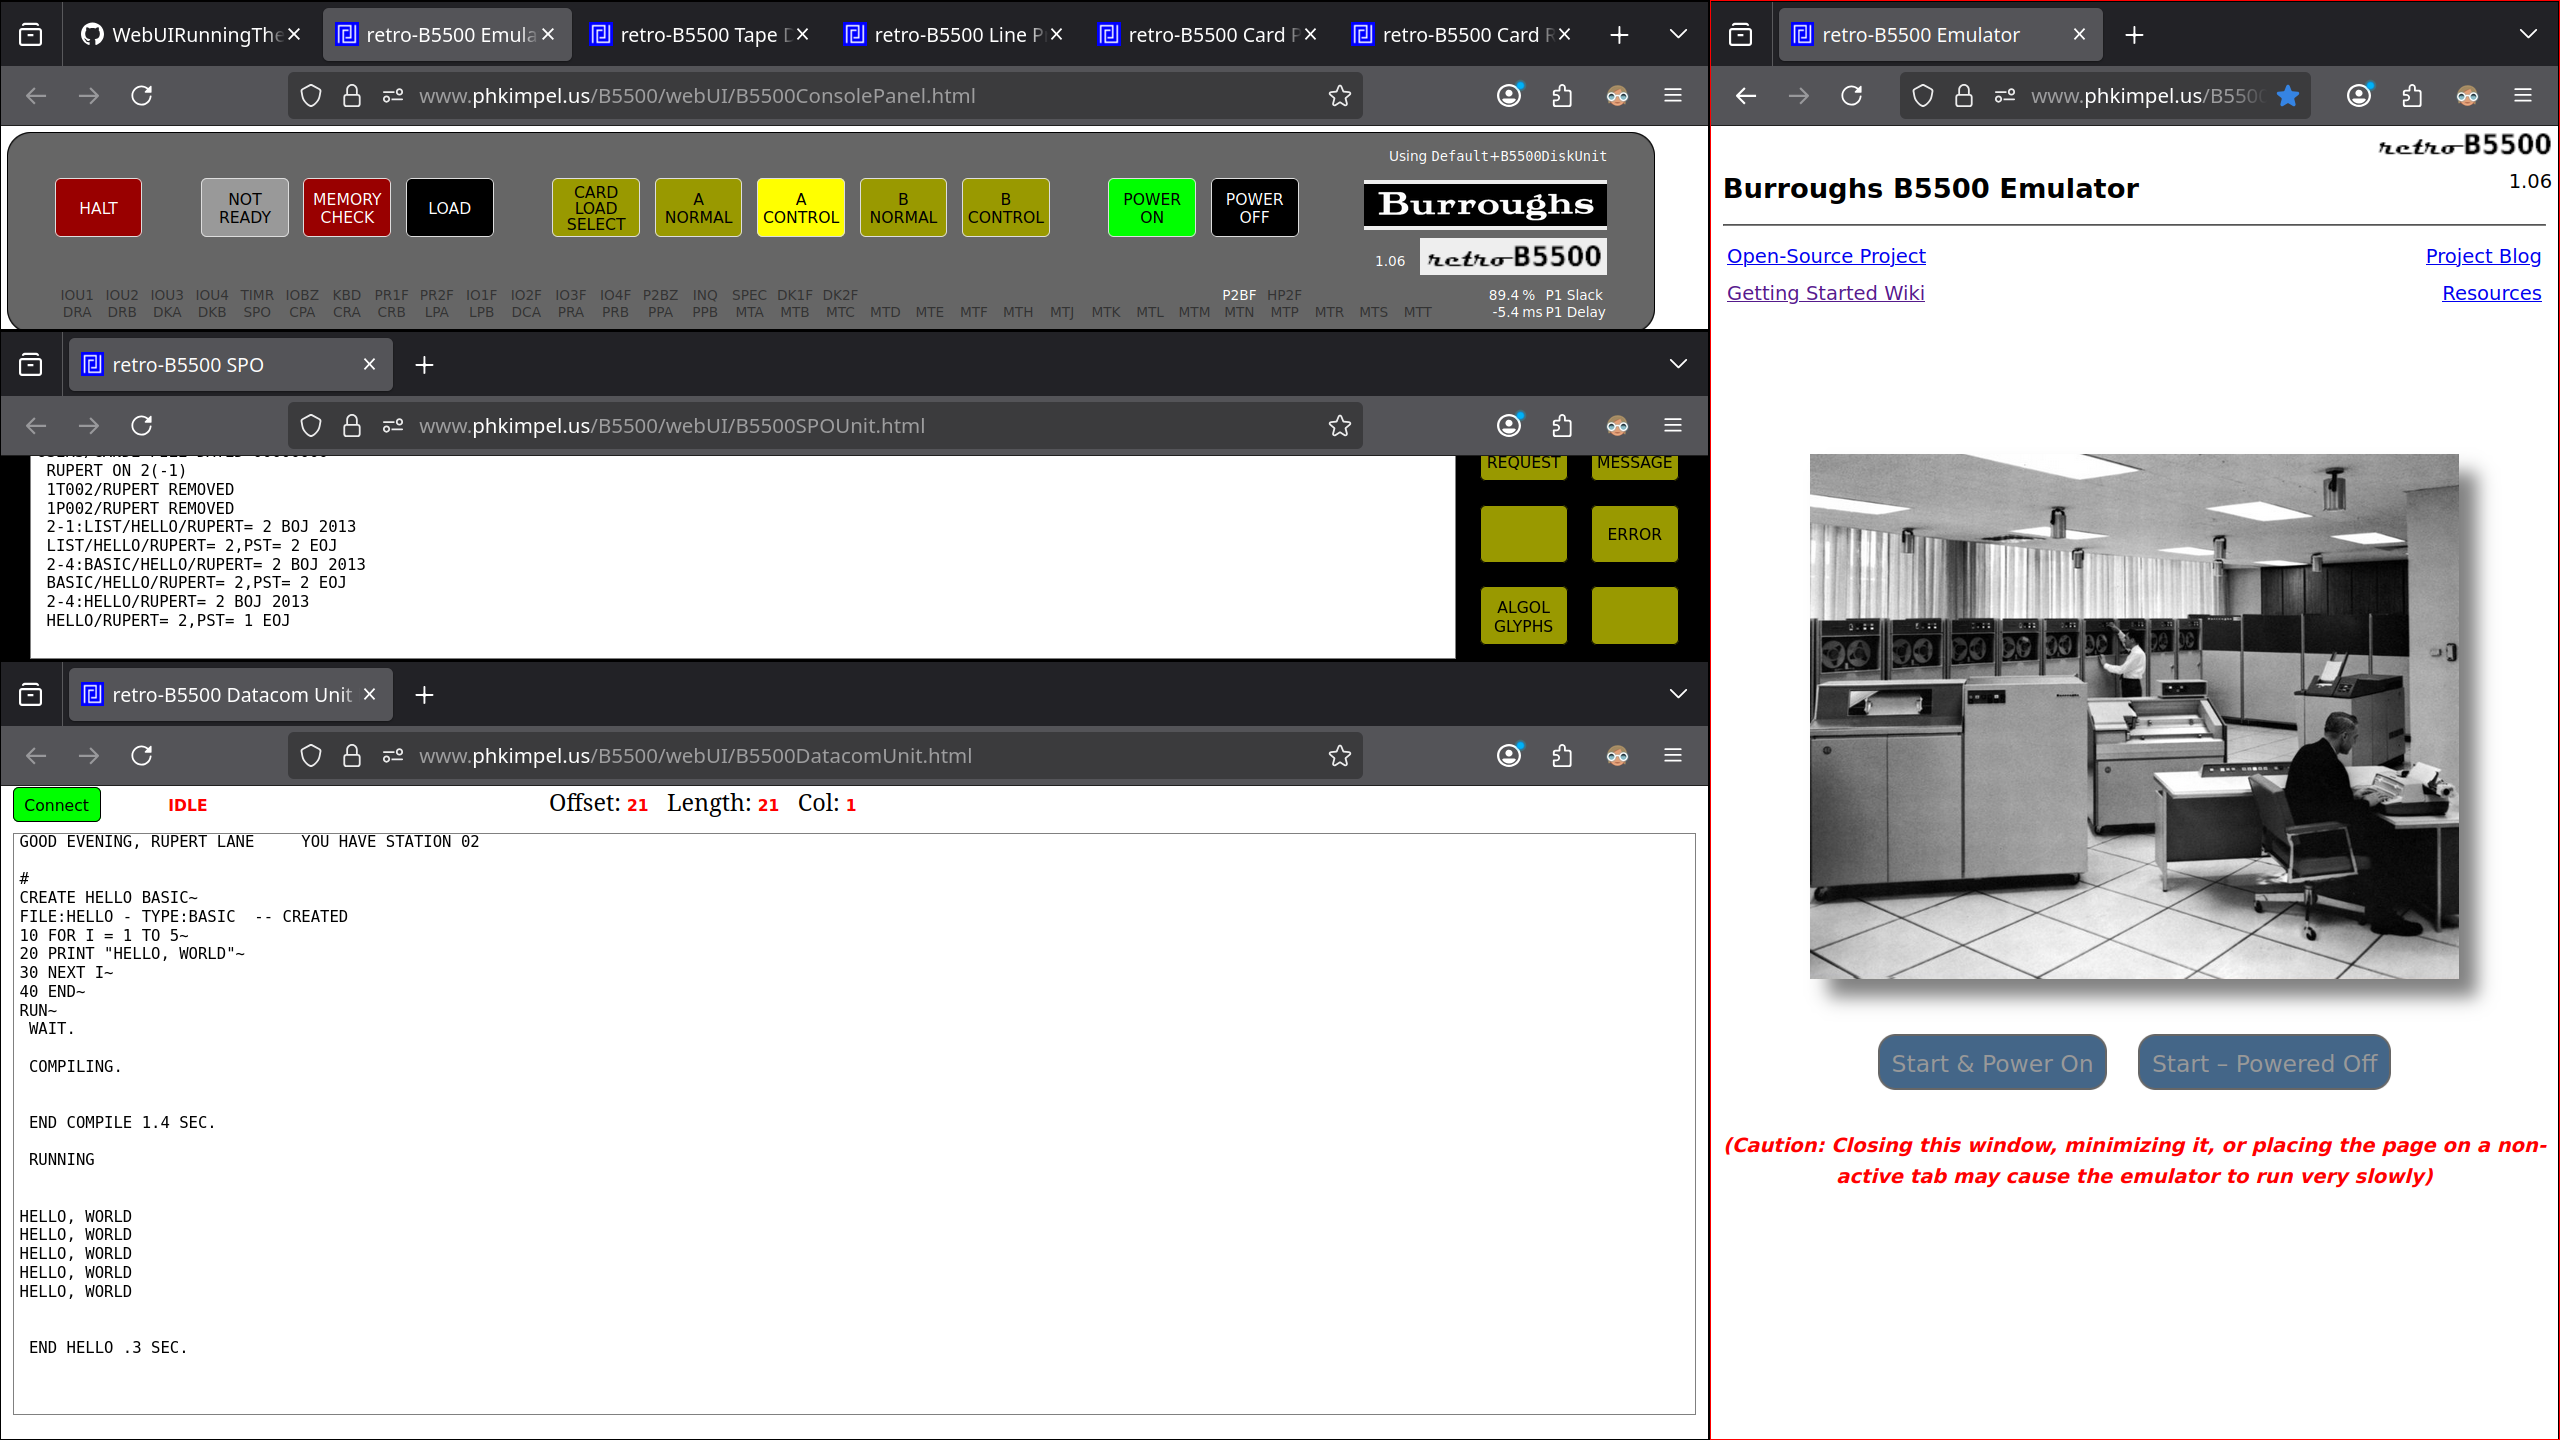
When you type RUN it will compile and execute the program. The
screen will look like this:

Note the tasks you are doing also show up in the SPO.
To finish, type SAVE to store the working copy of the program to
disk, and type BYE to log out. You can then click HALT on the main
console.
Questions, corrections, comments
I welcome any questions or comments, and also especially any corrections if I have got something wrong. Please email me at rupert@timereshared.com and I will add it here and update the main text.